
Snowmen Decoration

I saw two different ideas on Pinterest and decided to adapt a pattern for myself. My Snowman has a plain back side which has an opening at the bottom so you can place him on a small bottle so he is standing up.

Step One
Here is the original Pattern from Pinterest. You can see all my Boards at my Pinterest account Here.
As you can see I changed my project by not adding the arms and mittens. The Pinterest link did not have any instructions.

I used this cup for the circle and freehand drew the other pattern parts. The width is about three and 1/8 inches or 8 Centimeters.

I traced the circle from the cup. Then I used the circle as the top of the Body. I freehand drew the other pieces. I used the circle also as the basis for the neck area of the scarf, and the hat. Projects do not have to be perfectly copied. I change all the ideas I see at Pinterest to create a new individualized idea to suit my tastes. I give credit to the original as far as I can find it with research.


Step Two

Step Three

Pin the scarf back and the nose where you want it in conjunction of where you want to mark for the eyes and mouth. I used a red felt tip pen to lightly mark the area.
Mark the eyes and embroider the eyes with french knots and straight stitch for the mouth.French Knot video how to Here.
Step Four

Eyes are now done, Mouth is done. Remove nose and adjust the red scarf around the neck.

I put the nose on the body so I would not lose it. I used a color of embroidery floss all 6 stands to match the scarf. I just did a running stitch to attach the scarf to the body. Next you will do the nose.
Step Five

With two stands of a matching orange tack the nose to the face and over the top of the scarf part. This is why you attach the scarf before attaching the nose.

Close up of the Nose, Eyes and Mouth
I got the idea for my Snowmen from the above pattern plus these Pinterest ideas.

I just love his face - the way his smile dips below the scarf. I like his nose hanging over the scarf and that angle. He also does not have arms so that is what I liked - less complicated than the pattern above from Pinterest.

Close up of the nose area.
Step Six

Showing the "fringe" cutting on the lower scarf part. Place scarf over the top of the neck part of the scarp and pin into place.
Choose the embroidery floss and do the running stitch as shown below.
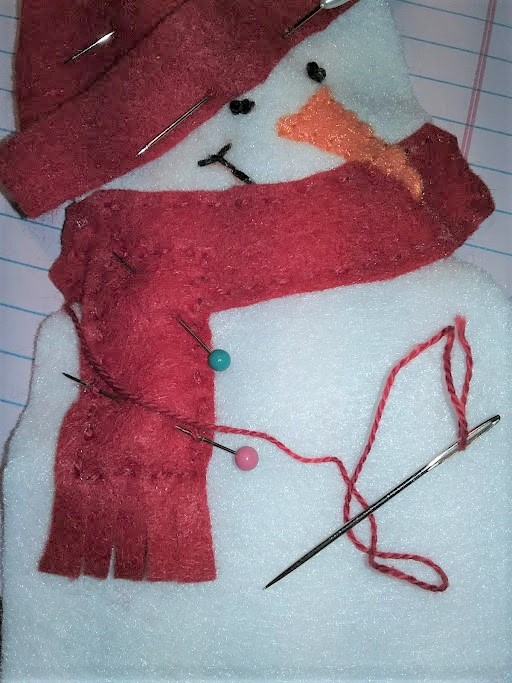
Note the running stitch is above the fringe area of the scarf.
Step Seven

Adding the running stitch on the hat brim and then the hat.
I used white embroidery floss and all 6 strands for the contrast.

I decided that I did not care for the white. So instead of taking it all out I just left it and did the top of the hat in a matching Red embroidery floss like the scarf.
Step Eight

I added matching buttons on the body with matching 6 strand embroidery floss. I used white thread for the white button on the hat.
Step Nine

I laid the Project over and traced paper over the top to cover just the hat top and the lower body. Then I cut out the backs.
I used white embroidery floss - 6 strands to attach the back to each snowman. I left an opening at the bottom so you could put him on a bottle to stand him up.

I made 6 Snowmen.

I though they all came out cute. You could also use white tiny pom poms on the top of the hat. I did not have any on hand so I use the white buttons. Each one is different and unique. I also trimmed the body to make rounded edges from my original pattern.


