Tuesday, October 17, 2017

Fall Leaves Plastic Canvas Coasters and Door Decoration

Fall Leaves


My oldest daughter and I both wanted some Fall Leaves for Decoration.  She wanted a set for Coasters for her Coffee table.  I made a set as a door decoration.

I found several patterns on Pinterest.  You can go to my Board at Pinterest here with a lot of Fall and Halloween Plastic Canvas patterns.  My Pinterest Board here.


Here are the six leaf shaped coasters I made for my daughter. My set will be about the same. 


This is the pattern I used.  Unfortunately the several pages I found at Pinterest are pretty blurry when you enlarge them.  You can go to my board as described above to get some patterns that are very similar.  Also I made a photo you you can see a piece of plastic canvas cut out and you can print and use.  


               The original Pinterest Pattern I used as a model 
                                 This leaf is 30 holes long and 29 holes wide.

                                                         
Burgundy leaf with mustard colored veins
Two tone greens leaf
Orange with Burgundy Veins
Medium Green with light green veins
Orange leaf with yellow veins
                                      Yellow leaf with dark green veins

First I cut out the leaves from size 7 Plastic canvas.  This is the regular type and not the stiff plastic canvas. 
Then I decided on the colors we wanted to use. As mentioned in my blog posts and Tutorials I get Acrylic yarn at the Big Box stores like WalMart or online.  I buy a large Skein for each color as I have been working on Plastic Canvas for 8 years [since 2009]. 

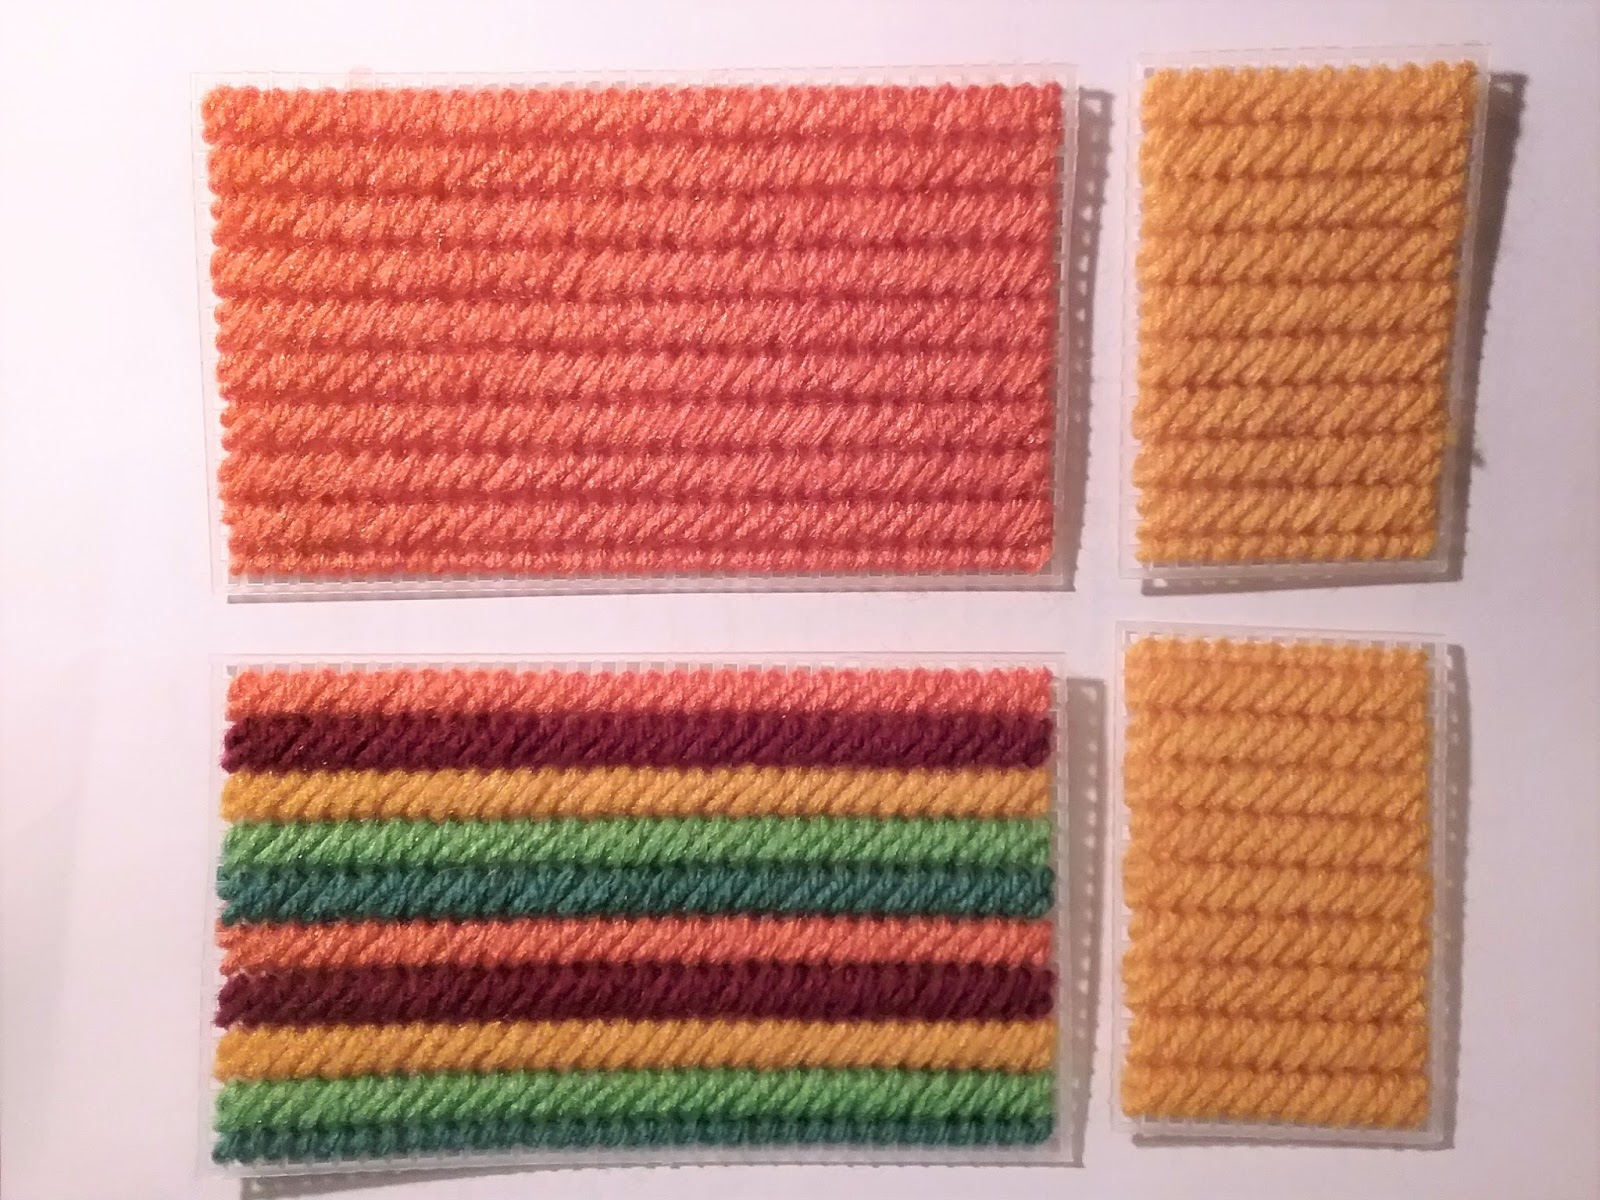
I do the veins first. I weave in and out every other hole on the diagonal and the one line vertically. I come back again and fill in the holes and posts of the leaf to complete the veins. 
The top of the leaf has both the holes with yarn vertically.
The bottom of the leaf show how to do every other hole to start then come back to cover the post of the plastic canvas. 


The rest except where I have to fill in one stitch, I cover two posts.
Showing th diagonal stitch over two posts coming up through the next hole to the right to make another stitch.  


After you fill in all the single and double stitches then you can whip stitch around the edges. 
  
Alternately you can just do all single stitches.  It works up faster to do the double stitches.  

Here is another leaf that is just a bit smaller with an alternative stitching pattern. 

https://www.pinterest.com/pin/457678380874349607/
                   Close up of the stitching pattern. 

The Coaster Holder

I made my coaster holder different from the pattern. I also made mine larger to accommodate 6 coasters with the felt backs.   

The holder is 20 holes tall by 34 holes wide. Cut two pieces this size.  The sides of the holder is 13 holes wide and 20 holes tall.  Also cut two pieces this size.


Work each piece as desired of a pattern you like and colors you want.  I thought of the colors like the candy Life Savers how they were stacked in the pkg. 
So I designed the front of the coaster holder like that.


After you stitch all four pieces you will need to cut a bottom piece 20 holes tall by 34 holes wide. You do not need to work a pattern on the bottom piece.
Attach the four sides in a whip stitch and add the bottom.

                      Front of the coaster holder 

              Top view showing the coaster holder 

You can add felt to the back of each coaster to make them more absorbent of liquids to protect your furniture.  
Lay a coaster on paper and trace the coaster.  Lay the paper on your felt and cut out the shape.  Use a glue gun to attach the felt to the back of the coaster.  
The glue gun works better than Aleene's tacky glue.  I have used Aleene's and eventually the felt came off. 

                    
                        Paper pattern for the felt


Yellow and Dark Green felt for the backs of the leaves

Dark Green felt

Here is how the leaves and the holder look on my daughters coffee table. Cute, eh?

My set of leaves as a Door Decoration

Then I made my set similar to the ones I made for my daughter.  


My leaves will not be coasters. I am using them for a door decoration. 

I took orange and burgundy yarn and braided it with three strands of each color.  I added that to the top for a hanger.  I added the same colors to the edges for the fringe.  I used one sheet of white colored plastic canvas. After I attached all 6 leaves and the 5 mini pumpkins I cut out the center of the plastic canvas. 
Close up so you can see the white plastic canvas, the mini pumpkins and the fringe. 

Be sure to check out my Pinterest Board with a lot more Plastic Canvas patterns for fall leaves as well as my other Crafting and Plastic Canvas Boards at https://www.pinterest.com/laceroseayla/


Wednesday, October 4, 2017

Snowmen decoration made of Felt


Snowmen Decoration


I saw two different ideas on Pinterest and decided to adapt a pattern for myself. My Snowman has a plain back side which has an opening at the bottom so you can place him on a small bottle so he is standing up.  


Step One

Here is the original Pattern from Pinterest. You can see all my Boards at my Pinterest account Here.
As you can see I changed my project by not adding the arms and mittens. The Pinterest link did not have any instructions.
https://www.pinterest.com/pin/457678380874049728/

I used this cup for the circle and freehand drew the other pattern parts. The width is about three and 1/8 inches or 8 Centimeters.


I traced the circle from the cup. Then I used the circle as the top of the Body. I freehand drew the other pieces. I used the circle also as the basis for the neck area of the scarf, and the hat.  Projects do not have to be perfectly copied. I change all the ideas I see at Pinterest to create a new individualized idea to suit my tastes. I give credit to the original as far as I can find it with research.


Copy Pattern Pieces and lay on felt, pin and cut one of each.

Layer the head above the body and pin.  Place the hat and carrot nose and pin.  Then pin the scarf around the neck. This is so you can draw the lines for the eyes and mouth that you will embroider with black embroidery floss. You can also use black puffy paint for the eyes and mouth.


Step Two
You can see where the head is place on the body. You can now remove the scarf. Use some white thread to attach the head to the body around the curve area where the scarf will cover the white thread. 

Step Three


Pin the scarf back and the nose where you want it in conjunction of where you want to mark for the eyes and mouth. I used a red felt tip pen to lightly mark the area. 
Mark the eyes and embroider the eyes with french knots and straight stitch for the mouth.
French Knot video how to Here.

Step Four


Eyes are now done, Mouth is done.  Remove nose and adjust the red scarf around the neck.


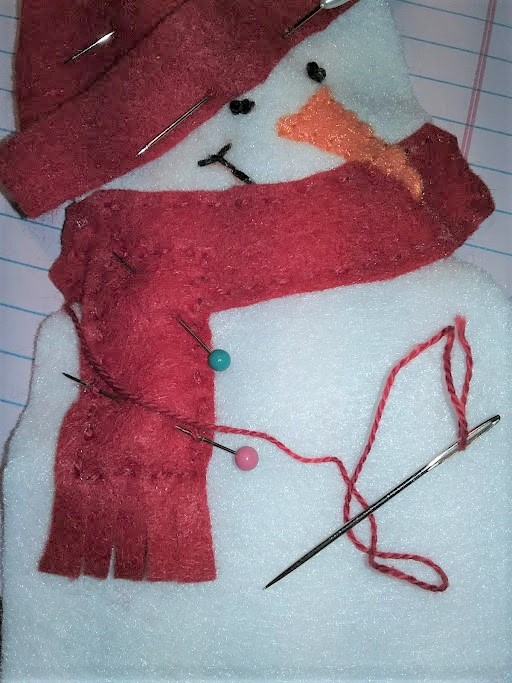
I put the nose on the body so I would not lose it.  I used a color of embroidery floss all 6 stands to match the scarf. I just did a running stitch to attach the scarf to the body.  Next you will do the nose. 

Step Five


With two stands of a matching orange tack the nose to the face and over the top of the scarf part. This is why you attach the scarf before attaching the nose. 


                                       Close up of the Nose, Eyes and Mouth 

I got the idea for my Snowmen from the above pattern plus these Pinterest ideas.

I just love his face - the way his smile dips below the scarf.  I like his nose hanging over the scarf and that angle.   He also does not have arms so that is what I liked - less complicated than the pattern above from Pinterest. 
Close up of the nose area. 


Step Six


Showing the "fringe" cutting on the lower scarf part. Place scarf over the top of the neck part of the scarp and pin into place. 
Choose the embroidery floss and do the running stitch as shown below.


Note the running stitch is above the fringe area of the scarf. 

Step Seven

Adding the running stitch on the hat brim and then the hat.  

I used white embroidery floss and all 6 strands for the contrast.  


I decided that I did not care for the white. So instead of taking it all out I just left it and did the top of the hat in a matching Red embroidery floss like the scarf. 

Step Eight


I added matching buttons on the body with matching 6 strand embroidery floss.  I used white thread for the white button on the hat.  


Step Nine

I laid the Project over and traced paper over the top to cover just the hat top and the lower body.  Then I cut out the backs.  
I used white embroidery floss - 6 strands to attach the back to each snowman.  I left an opening at the bottom so you could put him on a bottle to stand him up.


I made 6 Snowmen.


I though they all came out cute.  You could also use white tiny pom poms on the top of the hat.  I did not have any on hand so I use the white buttons.  Each one is different and unique.  I also trimmed the body to make rounded edges from my original pattern. 


Holly Leaves on Felt Mittens Tutorial

More Felt Projects

In my previous The Felt Mittens Tutorial page here at my blog you can see how I made the Mittens.  
Here is another Mitten design I made.  
For the Free Mitten pattern and the instructions click on the above link on how to make these cute Mittens. 

Included here is the pattern for the Holly leaves for these Mittens.

Print out this page for the Holly leaves 


Showing suggested placement of the Holly leaves on the Mittens. 


Cut out the pattern for the Holly leaves and place on felt.  Cut out the Holly shaped leaves. 

The basic idea from Pinterest shows a cute Mitten with Holly Leaves and a big red button for the Berries and a green button for decoration.

Finished Mitten with green Holly Leaves, small red buttons for the Berries, a red cuff for the Mitten and a green button for the cuff as decoration. 


The Holly Leaves look very dark, the felt is not that dark green. I had different size green and red buttons in various shades of Greens and Reds I got from WalMart. 

~~~~~~~~~~~~

Next blog post will be the Snowmen!